Why You Should Care About Checkpoints
Tutorial 30: Checkpoints & Rollback — easy-to-understand guide based on official docs
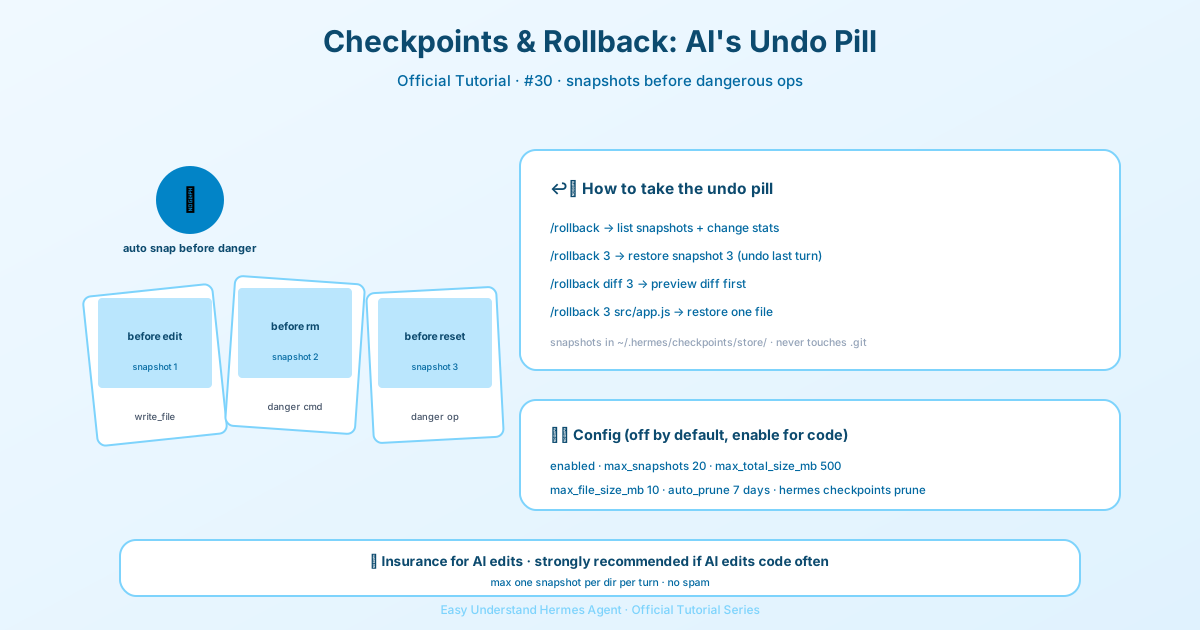
Why You Should Care About Checkpoints
Imagine you’re working on a project, and the AI agent makes a change that breaks everything. Without a safety net, you’d have to manually undo the damage or rely on your own git history. That’s where checkpoints come in — they’re like save points in a video game, letting you rewind to a moment before things went wrong.
What Are Checkpoints?
Checkpoints are automatic snapshots of your project taken before destructive operations. When Hermes Agent is about to do something risky — like overwriting a file or running a command that deletes data — it captures the current state of your code. If something goes wrong, you can restore that state with a single command.
The best part? Your real project’s .git directory is never touched. Hermes uses a shared shadow store at ~/.hermes/checkpoints/store/ — a separate git repository that keeps all your snapshots safe and deduplicated across projects.
Opt-In by Default
As of v2, checkpoints are off by default. Most users never need /rollback, and the shadow-store storage can grow over time. But if you’re working on something important, enabling it is easy.
Enable per-session:
hermes chat --checkpointsOr enable globally in ~/.hermes/config.yaml:
checkpoints:
  enabled: true
When Does Hermes Take a Checkpoint?
Hermes automatically snapshots before:
- File tools —
write_fileandpatch - Destructive terminal commands —
rm,rmdir,cp,install,mv,sed -i,truncate,dd,shred, output redirects (>), andgit reset/clean/checkout
The agent creates at most one checkpoint per directory per turn, so long-running sessions don’t spam snapshots.
Using /rollback in Session
The /rollback command is your time machine. Here’s the quick reference:
| Command | Description |
|---|---|
/rollback |
List all checkpoints with change stats |
/rollback <N> |
Restore to checkpoint N, keeping your hand-edits (also undoes last chat turn) |
/rollback <N> --all |
Full restore — overwrites your hand-edits too |
/rollback diff <N> |
Preview diff between checkpoint N and current state |
/rollback <N> <file> |
Restore a single file from checkpoint N |
When you run /rollback, you’ll see something like:
📸 Checkpoints for /path/to/project:

  1. 4270a8c  2026-03-16 04:36  before patch  (1 file, +1/-0)
  2. eaf4c1f  2026-03-16 04:35  before write_file
  3. b3f9d2e  2026-03-16 04:34  before terminal: sed -i s/old/new/ config.py  (1 file, +1/-1)
Managing the Store from the Shell
Outside a session, you can inspect and manage the checkpoint store with CLI commands:
| Command | Description |
|---|---|
hermes checkpoints |
Show total size, project count, per-project breakdown |
hermes checkpoints status |
Same as bare checkpoints |
hermes checkpoints list |
Alias for status |
hermes checkpoints prune |
Force a sweep: delete orphans/stale, GC, enforce size cap |
hermes checkpoints clear |
Nuke the entire checkpoint base (asks first) |
hermes checkpoints clear-legacy |
Delete only the legacy-* archives from v1 migration |
Running hermes checkpoints gives you a nice overview:
Checkpoint base: /home/you/.hermes/checkpoints
Total size:      142.3 MB
  store/         138.1 MB
  legacy-*       4.2 MB
Projects:        12

  WORKDIR                                                       COMMITS    LAST TOUCH  STATE
  /home/you/code/hermes-agent                                        20       2h ago  live
  /home/you/code/experiments/rl-runner                                8       1d ago  live
  /home/you/code/old-prototype                                        3       9d ago  orphan
Configuration Options
You can fine-tune checkpoint behavior in ~/.hermes/config.yaml:
checkpoints:
  enabled: false              # master switch (default: false — opt-in)
  max_snapshots: 20           # max checkpoints per project
  max_total_size_mb: 500      # hard cap on total store size
  max_file_size_mb: 10        # skip any single file larger than this
  auto_prune: true            # auto-clean old checkpoints
  retention_days: 7           # keep checkpoints for 7 days
  min_interval_hours: 24      # prune at most once per day
Auto-maintenance runs in the background — the CLI on a helper thread right after launch, the gateway on its housekeeping tick — so it never blocks your prompt or startup. The git gc that reclaims space can take tens of seconds on a large store, which is why it’s kept off the hot path. Orphan entries (working directory not found) are never auto-deleted, since a missing workdir is ambiguous; use hermes checkpoints prune for that.
How It Works Under the Hood
When Hermes detects a tool about to modify files, it:
- Resolves a reasonable project root for the file
- Initialises or reuses the shared shadow store
- Stages into a per-project index, builds a tree, and commits to a per-project ref
These per-project refs form a checkpoint history you can inspect and restore via /rollback.
Container Backends
If you’re using a container terminal backend (docker, singularity, modal, daytona, vercel_sandbox, or a container plugin), file paths live in the sandbox rather than on your host. Hermes doesn’t take checkpoints or record the agent-write ledger for those paths, and /rollback will tell you so: it still lists existing host checkpoints but refuses diff and restore. Local and SSH backends are unaffected.
Should You Enable It?
If you’re experimenting with new features, working on critical code, or just want peace of mind, enabling checkpoints is a no-brainer. The storage overhead is manageable, and the ability to undo a bad change in seconds is invaluable.
Give it a try — you might find that /rollback becomes your favorite safety net.
📖 Official Docs
This article is based on the official Hermes Agent documentation:Official docs › user-guide/checkpoints-and-rollback