Tutorial 16: Docker Deployment
Tutorial 16: Docker Deployment — easy-to-understand guide based on official docs
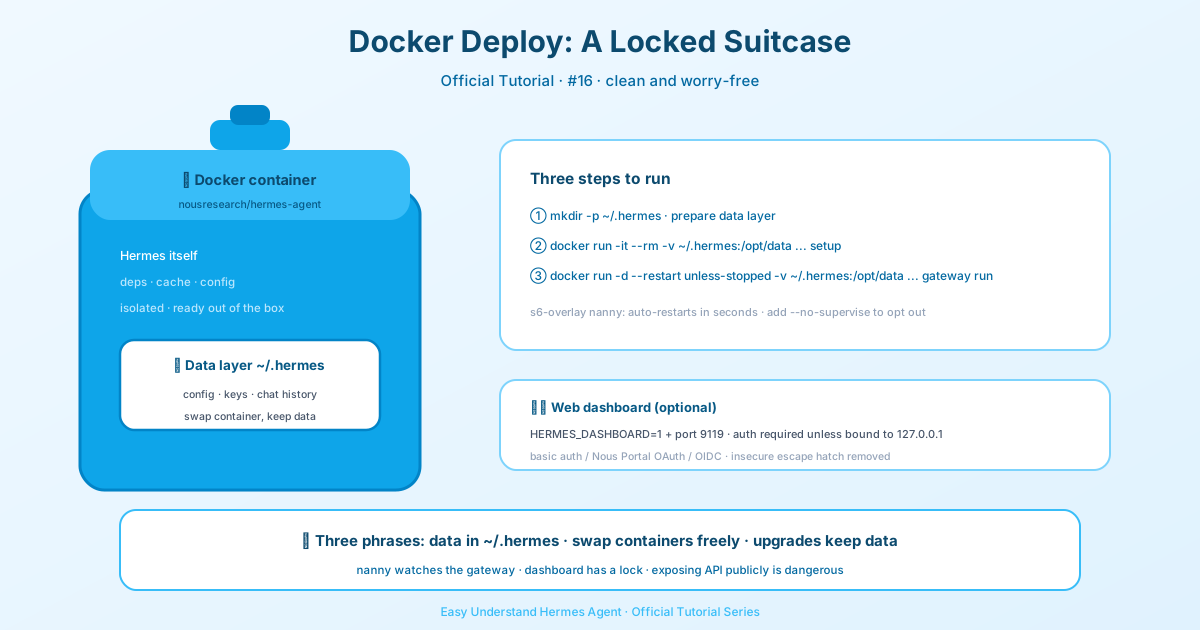
Tutorial 16: Docker Deployment
So you want to run Hermes Agent inside Docker? Great choice! This setup keeps everything clean, portable, and easy to upgrade. Let’s walk through it step by step.
Two Ways Docker Meets Hermes
Before we dive in, it’s worth knowing there are two distinct ways Docker intersects with Hermes Agent:
- Running Hermes IN Docker — the agent itself lives inside a container (that’s what we’ll cover here)
- Docker as a terminal backend — Hermes runs on your host but executes every command inside a persistent Docker sandbox container that survives across tool calls,
/new, and subagents
This tutorial focuses on option 1. The beauty of this approach? All your user data (config, API keys, sessions, skills, memories) lives in a single directory mounted from your host at /opt/data. The image itself is stateless — you can pull a new version and upgrade without losing anything.
Quick Start: First-Time Setup
If this is your first time running Hermes Agent, create a data directory on your host and start the container interactively to run the setup wizard:
mkdir -p ~/.hermes
docker run -it --rm \
  -v ~/.hermes:/opt/data \
  nousresearch/hermes-agent setup
This drops you into the setup wizard, which will prompt you for your API keys and write them to ~/.hermes/.env. You only need to do this once. It’s highly recommended to set up a chat system (like Telegram or Discord) at this point so your gateway has somewhere to send messages.
Pro tip: Inside the container, run hermes setup --portal once — the refresh token persists in your mounted ~/.hermes volume, so you won’t need to do it again. See the Nous Portal docs at https://hermes-agent.nousresearch.com/docs/integrations/nous-portal for details.
⚠️ A Word of Caution About Browser Consoles
Some VPS providers (Hetzner Cloud, and others) offer browser-based consoles that mangle special characters — : may arrive as ;, @ might get mis-rendered, and pasted API keys can get corrupted. Connect over SSH instead (ssh root@<host>) for copy-paste-safe command entry. If you must use the browser console, type commands manually and double-check every :, @, =, and / before hitting Enter.
Running in Gateway Mode
Once configured, run the container in the background as a persistent gateway (Telegram, Discord, Slack, WhatsApp, etc.):
docker run -d \
  --name hermes \
  --restart unless-stopped \
  -v ~/.hermes:/opt/data \
  -p 8642:8642 \
  nousresearch/hermes-agent gateway run
Port 8642 exposes the gateway’s OpenAI-compatible API server and health endpoint. It’s optional if you only use chat platforms, but required if you want the dashboard or external tools to reach the gateway.
Supervised by Default
Here’s something new and important: inside the official Docker image, gateway run is automatically supervised by s6-overlay. If the gateway process crashes, it’s restarted within seconds without losing the container. The dashboard (when enabled) is supervised alongside it.
The gateway run CMD process itself is a sleep infinity heartbeat that keeps the container alive while s6 manages the actual gateway process. So docker stop still shuts everything down cleanly, but docker logs shows the supervised gateway’s output.
To opt out (and get the old “container exit = gateway exit” behavior), pass --no-supervise or set HERMES_GATEWAY_NO_SUPERVISE=1. This is useful for CI smoke tests, but for production, the supervised default is strictly better.
Tool-Loop Hard Stops for Unattended Gateways
One important setting to know about: unattended gateway and cron sessions enable tool-loop hard stops by default through non_interactive_hard_stop_enabled. Interactive CLI, TUI, Desktop, and ACP sessions stay warning-only. If you want to opt an unattended deployment out, set this in your profile’s config.yaml:
tool_loop_guardrails:
  non_interactive_hard_stop_enabled: false
Exposing the API Server
The API server is gated on API_SERVER_ENABLED=true. To expose it beyond 127.0.0.1 inside the container, set API_SERVER_HOST=0.0.0.0 and an API_SERVER_KEY (minimum 8 characters — generate one with openssl rand -hex 32):
docker run -d \
  --name hermes \
  --restart unless-stopped \
  -v ~/.hermes:/opt/data \
  -p 8642:8642 \
  -e API_SERVER_ENABLED=true \
  -e API_SERVER_HOST=0.0.0.0 \
  -e API_SERVER_KEY="$(openssl rand -hex 32)" \
  -e API_SERVER_CORS_ORIGINS='*' \
  nousresearch/hermes-agent gateway run
Security warning: Opening any port on an internet-facing machine is a risk. Don’t do it unless you understand the implications.
Running the Dashboard
The built-in web dashboard runs as a supervised s6-rc service alongside the gateway in the same container. Set HERMES_DASHBOARD=1 to bring it up:
docker run -d \
  --name hermes \
  --restart unless-stopped \
  -v ~/.hermes:/opt/data \
  -p 8642:8642 \
  -p 9119:9119 \
  -e HERMES_DASHBOARD=1 \
  nousresearch/hermes-agent gateway run
The dashboard is supervised by s6 — if it crashes, it restarts automatically after a short backoff. Dashboard output is forwarded to docker logs <container>.
Dashboard Auth Is Mandatory on Public Binds
The dashboard’s auth gate engages automatically when the bind host is non-loopback (the container default is 0.0.0.0) and a DashboardAuthProvider plugin is registered. There are three bundled options: username/password (HERMES_DASHBOARD_BASIC_AUTH_USERNAME + _PASSWORD), OAuth via Nous Portal (HERMES_DASHBOARD_OAUTH_CLIENT_ID), or self-hosted OIDC (HERMES_DASHBOARD_OIDC_ISSUER + _CLIENT_ID).
If no provider is registered and the bind is non-loopback, the dashboard fails closed at startup. The old HERMES_DASHBOARD_INSECURE=1 escape hatch is now a deprecated no-op — it logs a warning and is ignored. Configure a provider, or bind HERMES_DASHBOARD_HOST=127.0.0.1 and reach the dashboard over an SSH tunnel or Tailscale instead.
Where the Logs Go
A quick note on log routing: per-profile gateways, the dashboard, and the boot reconciler all send their output to docker logs <container>. So you have one place to check everything.
A Note on SQLite and Bind Mounts
Hermes keeps sessions in a SQLite database (/opt/data/state.db) opened in WAL journal mode by default. WAL needs shared memory to stay coherent between processes, and bind mounts that cross a VM boundary — virtiofs (Docker Desktop and Podman on macOS, OrbStack) and 9p / drvfs (Docker Desktop on Windows) — don’t provide that. Concurrent writers can silently corrupt the database.
Since v2026.9.14, Hermes handles this for you: a fresh database on such a mount is created in rollback (DELETE) journal mode with a one-time warning, so there’s nothing to do. An existing WAL database is never live-downgraded — instead every process logs a one-time error and hermes doctor flags it. To fix it, either stop all Hermes processes and run a one-time offline conversion, or move your data to a named Docker volume (-v hermes-data:/opt/data), which lives on the VM’s own filesystem and supports WAL normally.
Wrapping Up
That’s it! You now have Hermes Agent running in Docker with persistent data, automatic restarts, and optional dashboard support. The supervised architecture means your gateway stays up even if the process crashes — which is exactly what you want for a production deployment.
Happy building! 🚀
📖 Official Docs
This article is based on the official Hermes Agent documentation:Official docs › user-guide/docker