Tutorial 9: Security Settings
Tutorial 9: Security Settings — easy-to-understand guide based on official docs
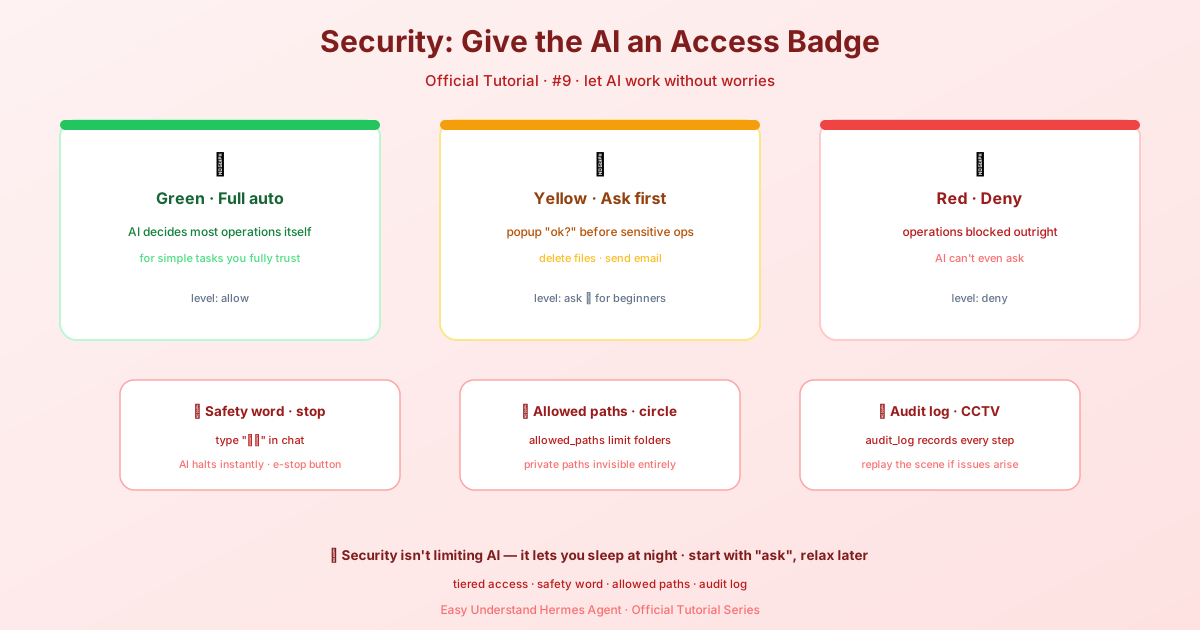
Tutorial 9: Security Settings
Welcome back, agent wranglers! In this tutorial, we’re diving into one of the most important—and often most confusing—parts of running an AI agent: security. Hermes Agent is built with a “defense-in-depth” model, which is a fancy way of saying it has multiple layers of protection so that if one fails, others still have your back.
Think of it like a castle: you wouldn’t just rely on a moat. You’d also want walls, guards, and a sturdy front door. Hermes has eight layers like that. Today, we’re focusing on the ones you’ll interact with most: dangerous command approval and YOLO mode.
The Approval System: Your Human-in-the-Loop
The core idea is simple: before Hermes runs a command that looks dangerous (like deleting files or changing system settings), it checks with you first. This is configured in ~/.hermes/config.yaml under the approvals section.
Here’s what the default setup looks like:
approvals:
  mode: smart                     # smart | manual | off
  timeout: 300                    # seconds to wait for user response
  cron_mode: deny                 # deny | approve — for cron jobs
  single_query_mode: deny         # deny | approve — for -q sessions
  unattended_mode: deny           # deny | approve — for webhook/API sessions
  mcp_reload_confirm: true        # confirm before reloading MCP tools
  destructive_slash_confirm: true # confirm before /clear, /new, etc.
The most important key is mode. It has three settings:
smart(default): Hermes uses a separate LLM to judge risk. Safe commands (likepython -c "print('hello')") are auto-approved. Truly dangerous ones are auto-denied. If it’s uncertain, it asks you.manual: Every dangerous command triggers a prompt. No exceptions.off: All checks are disabled. This is the same as running with--yolo. Only use this in trusted environments like CI/CD pipelines.
The other keys are about specific situations. For example, cron_mode controls what happens when a scheduled job hits a dangerous command. Since no human is waiting to answer, the default is deny—the agent has to find another way. The single_query_mode does the same for one-shot hermes chat -q sessions, and unattended_mode does it for sessions on unattended programmatic platforms (webhook, msgraph_webhook, api_server).
You’ll also notice destructive_slash_confirm. When set to true (the default), commands like /clear, /new, /reset, and /undo will ask for confirmation before wiping your conversation. On Telegram, Discord, and Slack, this shows up as native yes/no buttons. Nice touch, right?
One more thing worth knowing: if an approval prompt times out, it can’t be reopened. The pending request is discarded and the agent is told not to retry on its own within that turn. To run the operation after all, just send a new message asking for it (for example, “go ahead and run that now”)—the agent issues a fresh tool call, which raises a fresh approval card. A timeout is not counted as a denial, so asking again is never penalized.
YOLO Mode: With Great Power…
Sometimes you just want the agent to run without pestering you for approval. That’s what YOLO mode is for. It bypasses all dangerous command prompts for the current session.
You can activate it three ways:
- CLI flag:
hermes --yoloorhermes chat --yolo - Slash command: Type
/yoloduring a session to toggle it on or off - Environment variable: Set
HERMES_YOLO_MODE=1
The /yolo command is a toggle, so typing it again turns it off:
> /yolo
  ⚡ YOLO mode ON — all commands auto-approved. Use with caution.

> /yolo
  ⚠ YOLO mode OFF — dangerous commands will require approval.
When YOLO is active, Hermes makes sure you can’t forget it. You’ll see a red banner at session start and a ⚠ YOLO indicator in the status bar, updated live as you toggle it.
Important warning: YOLO mode disables all safety checks except the hardline blocklist—commands that are never allowed, no matter what. Use it only when you fully trust the commands being generated, like in a disposable test environment.
Supervised-Gateway Lifecycle Restriction
One guard you can’t switch off: the terminal tool refuses to stop or restart the gateway from inside its own supervised process, since a self-restart can kill the tool mid-run and trigger a supervisor/auto-resume loop. User approval, YOLO mode, and force=True do not bypass this guard.
The same guard also refuses process killers aimed at the interpreter image the gateway runs as—things like taskkill /F /IM python.exe, Stop-Process -Name python, pkill -9 python3, killall python, or pgrep python | xargs kill. A supervised gateway is literally a python process, so those commands would take it (and the agent’s own turn) down. Kills scoped to a process the agent owns still pass: the proc_* id of a background job, or an explicit PID like kill <pid>. Other image names (say, notepad.exe) are unaffected. This guard is active under every generated launcher—systemd unit, launchd plist, s6 run script, and the Windows Scheduled Task.
On macOS, executed launchctl submit and launchctl bootstrap commands are restricted regardless of the job label, so for authorized LaunchAgent maintenance, use a separate shell outside the running gateway.
What About File Writes and Containers?
While we’re focusing on approvals today, remember that Hermes also protects you in other ways. It has a denylist for write_file and patch operations, and it can sandbox file writes entirely. Container isolation (Docker, Singularity, Modal) is another layer, and MCP subprocesses get their own environment variable filtering to keep credentials separate.
There’s even prompt injection detection that scans your project files for malicious instructions, and cross-session isolation so one session can’t peek into another’s data.
Wrapping Up
Security doesn’t have to be scary. With Hermes, you get a smart default (smart mode) that balances safety and speed. Start there. As you get more comfortable, you can tweak the settings to match your workflow—just be careful with that YOLO switch.
Next time, we’ll look at cron jobs and how they interact with these security layers. Until then, keep your approvals on and your commands safe!
📖 Official Docs
This article is based on the official Hermes Agent documentation:Official docs › user-guide/security