Provider Routing — Smart Model Dispatching
Provider Routing — Smart Model Dispatching — easy-to-understand guide based on official docs
Provider Routing — Smart Model Dispatching
Think of Hermes as a busy office. Your main model is the lead agent who handles every conversation, every tool call, and every response. But the lead doesn’t do everything alone — there’s a team of auxiliary models handling side jobs like summarizing web pages, analyzing images, and compressing long conversations.
This guide walks you through configuring both from the dashboard. It’s easier than it sounds, and we’ll cover the new bits that make model management a breeze.
The Models Page: Your Control Center
Open the dashboard and click Models in the sidebar. You’ll see two sections:
- Model Settings — where you assign models to different slots
- Usage Analytics — ranked cards showing every model that ran a session, with token counts, cost, and capability badges
The top card is where the magic happens. The main row shows what the agent will use for new sessions. Click Change to open the picker.
Setting the Main Model
The picker has two columns:
- Left — your authenticated providers. Only providers you’ve actually set up (API key, OAuth, or custom endpoint) show up here. Missing one? Head to Keys and add the credential.
- Right — the curated model list for that provider. These are the agentic models Hermes recommends, not the raw 400+ model dump (which includes TTS, image generators, and rerankers you don’t need).
Type in the filter box to narrow things down, pick a model, hit Switch, and Hermes writes it to your config file. This applies to new sessions only — any chat tab you already have open keeps running its original model. To hot-swap the current chat, use the /model slash command inside it.
Mid-Session Switches: What You Should Know
When you switch models mid-conversation, Hermes checks whether your next message will trigger context compression against the new model’s window. If you’re near the limit, you’ll get a warning — but the switch still applies immediately.
Here’s the catch: prompt caches are tied to the specific model. Any mid-conversation switch (explicit, automatic fallback, or credential-pool rotation) means the next message re-reads the entire conversation at full price instead of the cached ~75–90% discount. On a long session, that one-time re-read can cost more than the per-token difference between models. Switch when you need to, but prefer doing it early in a conversation.
Because of that re-read cost, Hermes asks for explicit confirmation before applying a mid-session switch when the live session already holds a large context (default: 100,000 tokens, measured from the latest provider-billed prompt size). It shows up wherever a live session is switching — the CLI and TUI /model command and picker, and a typed gateway /model in a chat with an active agent. Tune or disable it in config.yaml:
model:
  # Ask before mid-session switches when the session exceeds this many
  # context tokens (the next reply re-reads them uncached). 0 disables.
  switch_context_confirm_tokens: 100000
Re-selecting the model you’re already on never prompts (the cache stays warm), and sessions with no measured context (fresh sessions, non-live surfaces) are exempt.
Unattended Data-Training Tiers
Some models (like muse-spark-1.2-contributor) are discounted because the vendor may train on your data. Interactive selection always shows a confirmation prompt, but unattended paths like Kanban workers and cron agents fail closed because they can’t ask.
If you’re okay with it, record a persistent acknowledgement:
hermes config set security.allow_data_training_tiers_noninteractive trueHermes still prints the full data-policy warning on every unattended startup for audit trails. Revoke it with:
hermes config unset security.allow_data_training_tiers_noninteractiveSetting Auxiliary Models
Click Show auxiliary to reveal 11 task slots: context compression, vision, web-page summarization, approval scoring, MCP tool routing, session-title generation, and skill search.
Every auxiliary task defaults to auto — meaning Hermes tries your main model for that job too. If that route fails, auto follows task-specific fallback chains, then the main fallback chain, then Hermes’ built-in discovery. Override a specific task when you want a cheaper or faster model for a side-job.
Provider Routing
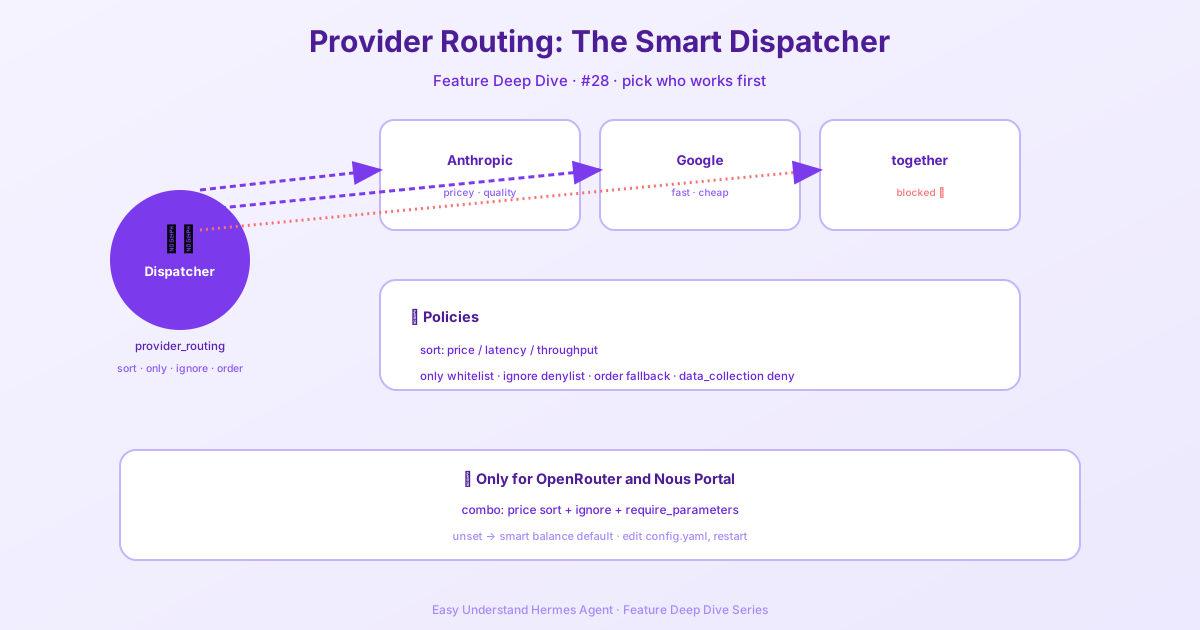
When you use OpenRouter as your LLM provider, Hermes supports provider routing — fine-grained control over which underlying AI providers handle your requests and how they’re prioritized. Add a provider_routing section to your ~/.hermes/config.yaml to sort by price, throughput, or latency, whitelist providers with only, blacklist them with ignore, set an explicit order, require full parameter support with require_parameters, or control training use with data_collection. You can also pin a different provider set per model under models, where each entry takes the same keys and overrides the flat value for that model only. Note that provider routing only applies when using OpenRouter — it has no effect on Nous Portal or direct provider connections.
Fastest Path: Nous Portal
Nous Portal gives you 300+ models under one subscription. On a fresh install, run:
hermes setup --portalThat logs you in and sets Nous as your provider in one command. Inspect what’s wired up with hermes portal info.
One Last Note on the model: Schema
On a brand-new install, your config has model: "" (an empty string meaning “not configured yet”). The first time you run hermes setup or hermes model, that key upgrades in-place to a mapping with provider, default, base_url, and api_mode sub-keys. If you ever see an empty string, run hermes model (or click Change in the dashboard) and Hermes will write the proper form for you.
That’s it — you’re now equipped to route models like a pro. Happy dispatching!
📖 Official Docs
This article is based on the official Hermes Agent documentation:Official docs › user-guide/configuring-models