Email — AI Sends and Receives Mail
Email — AI Sends and Receives Mail — easy-to-understand guide based on official docs
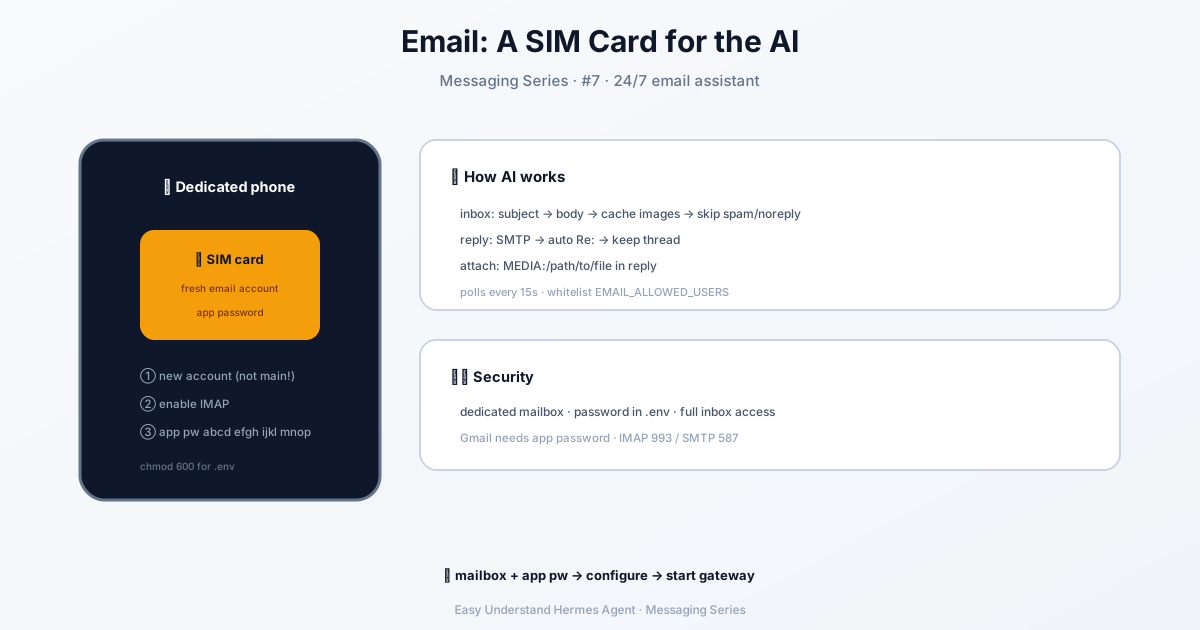
Email — AI Sends and Receives Mail
Imagine this: you send an email to your AI agent, and it replies back — right in the same thread. No fancy chat app, no bot API, no extra software. Just plain old email. That’s exactly what the Email gateway adapter does for Hermes.
In this post, we’ll walk through how to set it up, how it works under the hood, and how to keep your inbox secure.
Why Email?
Email is universal. Everyone has an address. By plugging Hermes into your mailbox via standard IMAP (for receiving) and SMTP (for sending), you get a conversational AI that works with Gmail, Outlook, Yahoo, Fastmail, or any provider that supports these protocols.
And here’s the best part: there are zero external dependencies. The adapter uses Python’s built-in imaplib, smtplib, and email modules. No extra packages, no third-party services.
Note: This is different from the bundled Himalaya email skill, which lets the agent manage your mailbox through terminal commands. That one requires the external
himalayaCLI. This gateway adapter is the simpler, self-contained path.
Before You Start
You’ll need three things:
- A dedicated email account for your agent (please don’t use your personal inbox)
- IMAP enabled on that account
- An app password if you’re using Gmail or any provider with two-factor authentication
For Gmail: enable 2FA, then create an App Password at myaccount.google.com/apppasswords. You’ll get a 16-character password — use that instead of your regular one.
For Outlook/Microsoft 365: enable 2FA, create an app password under “Additional security options,” and use outlook.office365.com for IMAP and smtp.office365.com for SMTP.
For other providers, check their docs for IMAP/SMTP hosts and ports (usually 993 for IMAP SSL, 587 for SMTP STARTTLS).
Proton Mail Bridge / local relays. Proton Mail Bridge (and similar local relays such as a self-hosted MTA) listen on loopback with STARTTLS and a self-signed certificate, so the defaults (implicit TLS on IMAP 993, verified certificates) won’t connect. Override the transport in ~/.hermes/config.yaml:
platforms:
  email:
    enabled: true
    extra:
      imap_host: 127.0.0.1
      imap_security: starttls     # tls (default) | starttls | plain
      imap_tls_verify: false      # Bridge uses a self-signed cert
      smtp_host: 127.0.0.1
      smtp_security: starttls     # default: tls on port 465, starttls otherwise
      smtp_tls_verify: false
and set EMAIL_IMAP_PORT=1143 / EMAIL_SMTP_PORT=1025 alongside your Bridge credentials in ~/.hermes/.env. Unknown *_security values log a warning and fall back to the secure default. Only disable *_tls_verify for loopback hosts — Hermes logs a warning when verification is off for any other host.
Step 1: Configure Hermes
The easiest way is the setup wizard:
hermes gateway setupSelect Email from the menu and follow the prompts. It’ll ask for your address, app password, IMAP/SMTP hosts, and allowed senders.
Prefer manual config? Add this to ~/.hermes/.env:
# Required
EMAIL_ADDRESS=hermes@gmail.com
EMAIL_PASSWORD=abcd efgh ijkl mnop    # App password, not your regular one
EMAIL_IMAP_HOST=imap.gmail.com
EMAIL_SMTP_HOST=smtp.gmail.com

# Security (recommended)
EMAIL_ALLOWED_USERS=your@email.com,colleague@work.com

# Optional
EMAIL_IMAP_PORT=993                    # Default: 993
EMAIL_SMTP_PORT=587                    # Default: 587
EMAIL_POLL_INTERVAL=15                 # Seconds between inbox checks
EMAIL_HOME_ADDRESS=your@email.com      # Default delivery target for cron jobs
Step 2: Start the Gateway
hermes gateway              # Run in foreground
hermes gateway install      # Install as a user service
sudo hermes gateway install --system   # Linux: boot-time system service
On startup, the adapter tests both IMAP and SMTP connections, marks all existing inbox messages as “seen” (so it only processes new emails), and starts polling.
How It Works
Receiving messages. The adapter checks for UNSEEN emails every 15 seconds by default. For each new message:
- The subject line is included as context (e.g.,
[Subject: Deploy to production]) - Replies (subject starting with
Re:) skip the subject prefix — the thread context is already there - Attachments are cached locally: images become available to the vision tool, documents like PDFs and ZIPs for file access
- HTML-only emails get tags stripped for plain text extraction
- Self-messages are filtered out to prevent reply loops
- Automated senders are silently ignored —
noreply@,mailer-daemon@,bounce@, and emails withAuto-Submitted,Precedence: bulk, orList-Unsubscribeheaders
Sending replies. Replies go out via SMTP with proper threading: In-Reply-To and References headers keep the conversation together, the subject keeps its Re: prefix (no double Re: Re:), and responses are sent as plain UTF-8 text.
File attachments. Want the agent to send a file back? Just include MEDIA:/path/to/file in its response and it’ll be attached automatically.
Skipping attachments. Worried about malware or bandwidth? Add this to config.yaml:
platforms:
  email:
    skip_attachments: true
The email body text is still processed normally — only attachments are ignored.
Access Control: Be Strict by Default
Email is more locked down than chat platforms by design:
EMAIL_ALLOWED_USERSset → only emails from those addresses are processed- No allowlist set → unknown senders are ignored silently
EMAIL_ALLOW_ALL_USERS=true→ any sender is accepted (use with caution!)platforms.email.unauthorized_dm_behavior: pair→ unknown senders receive a pairing code
The golden rule: use a dedicated inbox and always configure EMAIL_ALLOWED_USERS. Email pairing is opt-in because shared inboxes often contain unrelated unread messages — Hermes shouldn’t reply to those contacts by default.
Troubleshooting
| Problem | Solution |
|---|---|
| “IMAP connection failed” at startup | Verify EMAIL_IMAP_HOST and EMAIL_IMAP_PORT. Make sure IMAP is enabled on the account (Gmail: Settings → Forwarding and POP/IMAP) |
| “SMTP connection failed” at startup | Verify EMAIL_SMTP_HOST and EMAIL_SMTP_PORT. Check that your password is correct (use an App Password for Gmail). |
| Messages not received | Check EMAIL_ALLOWED_USERS includes the sender’s email. Check spam folder — some providers flag automated replies. |
| “Authentication failed” | For Gmail, you must use an App Password, not your regular password. Ensure 2FA is enabled first. |
| Duplicate replies | Ensure only one gateway instance is running. Check hermes gateway status. |
| Slow response | The default poll interval is 15 seconds. Reduce with EMAIL_POLL_INTERVAL=5 for faster response (but more IMAP connections). |
| Replies not threading | The adapter uses In-Reply-To headers. Some email clients (especially web-based) may not thread correctly with automated messages. |
Wrapping Up
The Email gateway adapter turns any standard mailbox into a communication channel for your AI agent. No external dependencies, no special clients — just IMAP, SMTP, and a little configuration. Set up a dedicated account, lock down your allowed senders, and let the emails flow.
Happy emailing! 📧
📖 Official Docs
This article is based on the official Hermes Agent documentation:Official docs › user-guide/messaging/email