MCP — Connect Hermes to Thousands of Tools
MCP — Connect Hermes to Thousands of Tools — easy-to-understand guide based on official docs
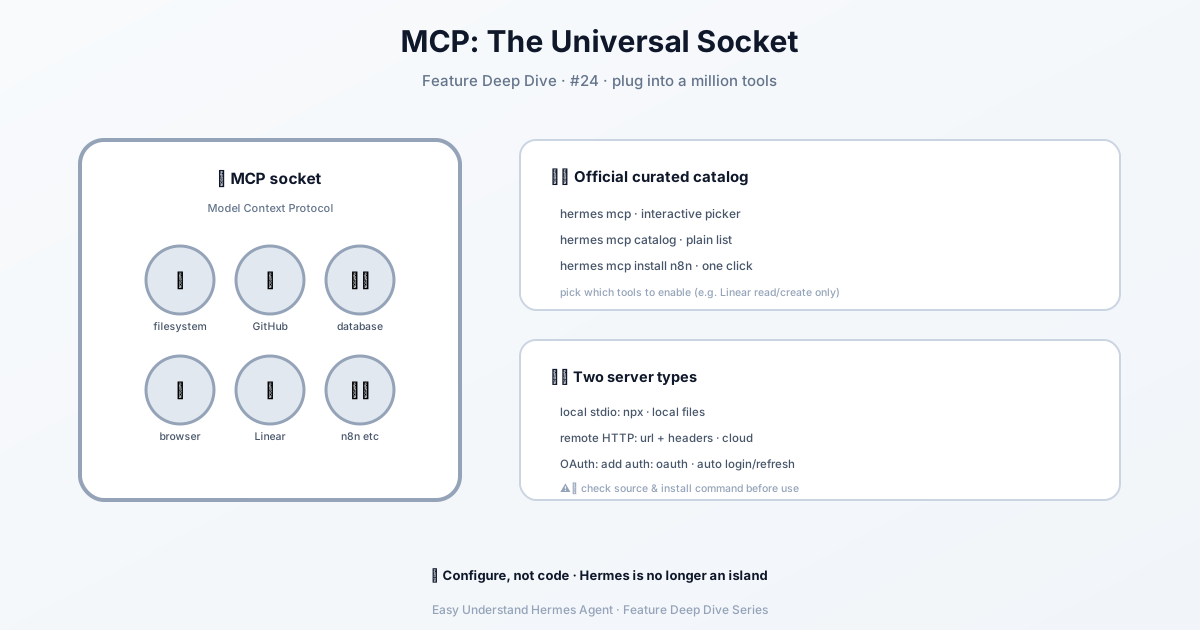
MCP — Connect Hermes to Thousands of Tools
If you’ve ever wished Hermes could use a tool that already exists somewhere else — a GitHub bot, a database client, a file browser — MCP is the cleanest way to make that happen. MCP (Model Context Protocol) lets Hermes plug into external tool servers, so the agent can use tools that live outside Hermes itself.
Think of it like this: Hermes is the brain, and MCP is the nervous system that connects it to hands, eyes, and ears that someone else already built. No need to reinvent the wheel.
What MCP Gives You
- Access to external tool ecosystems without writing a native Hermes tool first
- Local stdio servers and remote HTTP servers in the same config
- Automatic tool discovery at startup — Hermes finds and registers everything for you
- Utility wrappers for MCP resources and prompts when the server supports them
- Per-server filtering so you expose only the tools you actually want Hermes to see
Quick Start
MCP ships with the standard install — no extra step needed. Here’s how to get going:
- Add an MCP server to
~/.hermes/config.yaml:
mcp_servers:
  filesystem:
    command: "npx"
args: ["-y", "@modelcontextprotocol/server-filesystem", "/home/user/projects"]- Start Hermes:
hermes chat- Ask Hermes to use the MCP-backed capability:
List the files in /home/user/projects and summarize the repo structure.Hermes will discover the MCP server’s tools and use them like any other tool. That’s it.
The Catalog: One-Click Install
Hermes ships with a curated catalog of MCP servers that Nous staff has reviewed and merged. They’re disabled by default — install only what you actually want.
In the desktop app you can also just ask: “add the Linear MCP”. The agent calls manage_connections with an mcp: true target, an approval card appears in the chat, and Install writes the same config the CLI would. On the CLI and in messaging apps the agent relays the commands below instead.
hermes mcp                   # interactive picker (default)
hermes mcp catalog           # plain-text list, scriptable
hermes mcp install deepwiki  # install a catalog entry by name
The picker shows each entry with its current status:
deepwiki     available              Ask questions about public GitHub repositories
linear       enabled                Linear issue/project management (remote OAuth)
github       installed (disabled)   GitHub repo + PR tools
Hit Enter on a row to install, enable, disable, or uninstall. Catalog entries live in optional-mcps/ in the hermes-agent repo — presence there means Nous approval. No community submissions; entries are added by merging a PR.
The third-party n8n bridge is no longer available for catalog installation. Existing installations keep their mcp_servers configuration, credentials, installed files, and selected tools — they still load as configured MCP servers and show up as custom entries in the picker, where you can configure tools or enable and disable them. Catalog reinstall is no longer available, and existing connections are not migrated to n8n’s official MCP server.
n8n’s Official MCP Server
The n8n-official catalog entry connects directly to your n8n Cloud or self-hosted instance over HTTP with browser OAuth. No local bridge or n8n API key is required.
- Ask an owner or admin to enable Settings > Instance-level MCP in n8n.
- Open Connect and copy the full Server URL ending in
/mcp-server/http— not the editor URL. - Run
hermes mcp install n8n-officialand enter that URL when prompted. - Complete browser OAuth. If needed, run
hermes mcp login n8n-official, or use Authorize on the configured server in Desktop or the dashboard. - Review tools with
hermes mcp configure n8n-official, then start a new session or use/reload-mcp.
Your Hermes backend must be able to reach the URL. n8n controls permissions and workflow exposure, and some tools modify or run workflows. See n8n’s connection guide.
This entry uses the existing catalog setup and storage behavior, and it’s separate from the retired n8n bridge — so existing connections, credentials, installed files, and tool selections are not replaced.
Tool Selection at Install Time
After credentials are configured, Hermes probes the MCP server to list every tool it exposes and presents a checklist:
Select tools for 'linear' (SPACE toggle, ENTER confirm)
  [x] find_issues       Find issues matching a query
  [x] get_issue         Get a single issue
  [x] create_issue      Create a new issue
  [ ] delete_workspace  Delete a Linear workspace
  ...
The pre-checked rows come from:
- Your prior selection if you’ve installed this entry before
- The manifest’s
tools.default_enabledif the entry declares one - Everything if neither applies
Some entries with huge auto-generated surfaces (like cloudflare with ~3,300 OpenAPI endpoints) instead declare tools.default_excluded — a curated block-list. Installing one of these skips the checklist and writes tools.exclude; everything not matched stays enabled.
Submit with ENTER. Only checked tools end up in mcp_servers.<name>.tools.include. If you select everything, no filter is written — cleanest config shape.
If the probe fails (server unreachable, OAuth not done), the install still succeeds using the manifest’s defaults. Re-run hermes mcp configure <name> once the server is reachable to refine.
Entries That Need Your Own OAuth App
Some vendors run their remote MCP behind OAuth but don’t offer Dynamic Client Registration — every client must be an app you pre-register in the vendor’s developer console. Asana’s V2 server (https://mcp.asana.com/v2/mcp) is the shipped example; the retired V1 server accepted any client, V2 does not.
For these, the manifest declares the credentials under auth.env and pins the client under auth.oauth, so installing it prompts for the Client ID and secret, stores them in your profile’s .env, and writes only ${VAR} references to config.yaml. Read the entry’s post_install notes for the exact app type and redirect URL to register, then run hermes mcp login <name> and restart (or /reload-mcp) the session or gateway that should expose the tools. The dashboard / Desktop Authorize button works too, but because the client is pre-registered with a pinned redirect_port, the browser you approve in must run on the same machine as the Hermes process — for a remote host, use hermes mcp login over SSH port-forwarding.
Trust Model
Installing a catalog entry runs whatever the manifest specifies — git clone, bootstrap commands (pip install, npm install), and the MCP server’s own code. Manifests are gated by PR review into the hermes-agent repo, so Nous has reviewed each entry — but you should still read the manifest before installing, especially the source: field, install.bootstrap: commands, and transport.command:.
Manifests live at optional-mcps/<name>/manifest.yaml on GitHub. The picker prints the source: URL at install time so you can verify the upstream repo. The web dashboard’s MCP page shows the same detail — transport, auth type, endpoint URL, git source, bootstrap commands — with source: as a clickable link.
Coming from Claude Code?
The mcpServers block in your ~/.claude.json maps to mcp_servers in Hermes’ config.yaml — and hermes import-agent claude-code migrates it automatically, along with skills and instructions.
MCP is the bridge between Hermes and the wider tool ecosystem. Start with one server, see how it feels, then expand. The catalog makes it a few keystrokes away.
📖 Official Docs
This article is based on the official Hermes Agent documentation:Official docs › user-guide/features/mcp