Microsoft Teams — Enterprise Chat
Microsoft Teams — Enterprise Chat — easy-to-understand guide based on official docs
Think of connecting Hermes Agent to Microsoft Teams like giving your AI assistant a company badge — once it’s on the team, it can join meetings, answer questions in channels, and help out in DMs, all without leaving the app your colleagues already use every day.
Why Teams Is Different from Slack
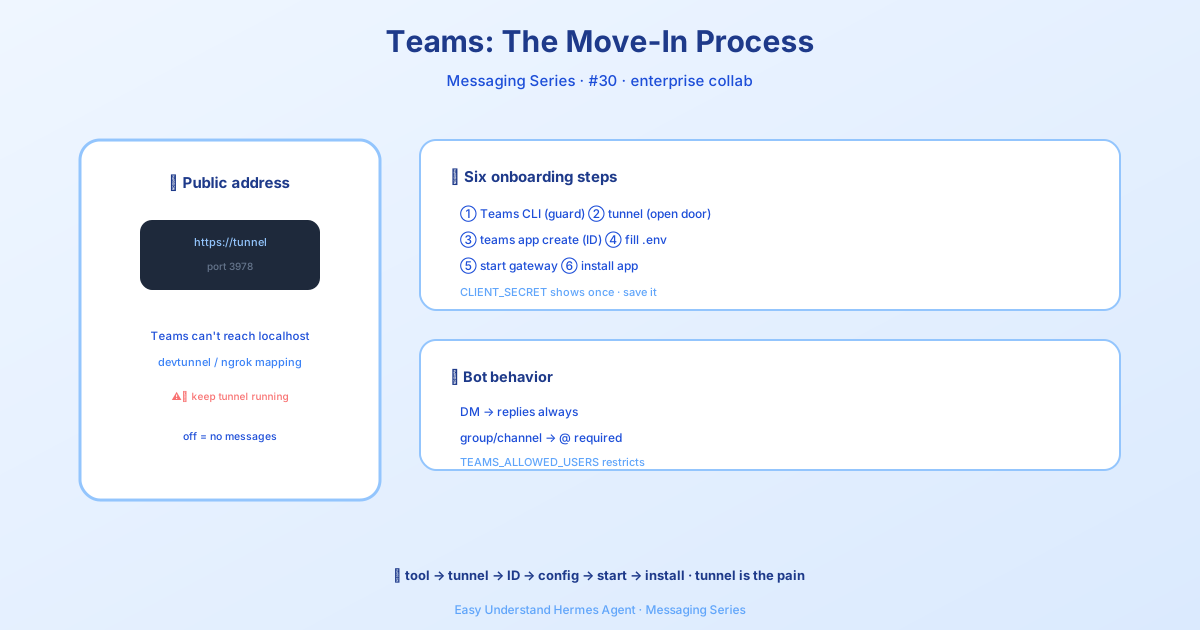
If you’ve used Slack’s Socket Mode before, Teams works a bit differently. Instead of keeping an open connection, Teams calls your bot’s public webhook whenever someone sends a message. That means your Hermes instance needs a public HTTPS URL — not localhost. For testing, you can use a tunnel; for production, you’ll point it at your real server domain.
How the Bot Behaves
Here’s the simple rule of thumb:
| Where you talk to it | What happens |
|---|---|
| Personal chat (DM) | Bot replies to every message — no need to @mention |
| Group chat | Bot only replies when you @mention it |
| Channel | Bot only replies when you @mention it |
Teams sends @mentions as <at>BotName</at> tags, but Hermes automatically strips them before processing — so you don’t have to worry about that.
By default, Teams only delivers messages that @mention your bot, so nothing extra is needed. But if your app manifest grants resource-specific consent (RSC) to read messages — ChannelMessage.Read.Group or ChatMessage.Read.Chat — Teams starts delivering every message in that conversation. In that case, set require_mention: true (or TEAMS_REQUIRE_MENTION=true) so the bot only answers channel and group-chat messages that @mention it or reply to one of its own. Personal chats are never gated, and a gated message is dropped before its attachments are downloaded.
Step 1: Install the Teams CLI
First, install Microsoft’s command-line tool that automates bot registration — no Azure portal needed:
npm install -g @microsoft/teams.cli@preview
teams login
To verify your login and find your AAD object ID (you’ll need this later to restrict access), run:
teams status --verboseStep 2: Expose the Webhook Port
Teams can’t deliver messages to localhost. For local development, use a tunnel to get a public HTTPS URL. The default port is 3978 (change it with TEAMS_PORT if needed).
Here are three easy options:
# devtunnel (Microsoft)
devtunnel create hermes-bot --allow-anonymous
devtunnel port create hermes-bot -p 3978 --protocol https
devtunnel host hermes-bot

# ngrok
ngrok http 3978

# cloudflared
cloudflared tunnel --url http://localhost:3978
Copy the https:// URL from the output — you’ll need it in the next step. Leave the tunnel running while you develop.
One thing to keep straight: the public tunnel URL is HTTPS, but Hermes’ local webhook listener speaks plain HTTP. The tunnel terminates TLS and forwards HTTP to port 3978 — don’t set the local tunnel port to HTTPS.
Step 3: Create the Bot
Now register your bot with Teams:
teams app create \
  --name "Hermes" \
  --endpoint "https://<your-tunnel-url>/api/messages"
The CLI will output your CLIENT_ID, CLIENT_SECRET, and TENANT_ID, plus an install link. Save the client secret immediately — it won’t be shown again.
Step 4: Configure Environment Variables
Add these to your ~/.hermes/.env file:
# Required
TEAMS_CLIENT_ID=<your-client-id>
TEAMS_CLIENT_SECRET=<your-client-secret>
TEAMS_TENANT_ID=<your-tenant-id>

# Restrict access to specific users (recommended)
# Use AAD object IDs from `teams status --verbose`
TEAMS_ALLOWED_USERS=<your-aad-object-id>
Step 5: Start the Gateway
If you’re using Docker, run from the directory that contains docker-compose.yml (usually your cloned hermes-agent repo, not ~):
cd /path/to/hermes-agent
HERMES_UID=$(id -u) HERMES_GID=$(id -g) docker compose up
For source installs, make sure you include the Teams extra first:
uv sync --extra teams
# or, for editable installs:
uv pip install -e ".[teams]"
The default webhook port is 3978 (override with TEAMS_PORT). To confirm it’s up, hit the health endpoint:
curl http://localhost:3978/health # should return: okWrapping Up
Connecting Hermes to Teams is a four-step dance: install the CLI, expose a public URL, create the bot, and set your environment variables. Once it’s running, your AI assistant becomes a full team member — responding in DMs automatically and joining group chats when summoned.
Practical tip: Start with TEAMS_ALLOWED_USERS set to just your own AAD object ID. That way, you can test safely without worrying about random colleagues triggering your bot — then expand access once you’re confident everything works.
📖 Official Docs
This article is based on the official Hermes Agent documentation:Official docs › user-guide/messaging/teams