Hermes NixOS Setup — Tutorial 12: Nix & Flake
Install Hermes Agent on NixOS: run it ad hoc, install it persistently, and wire up the NixOS module or the flake input.
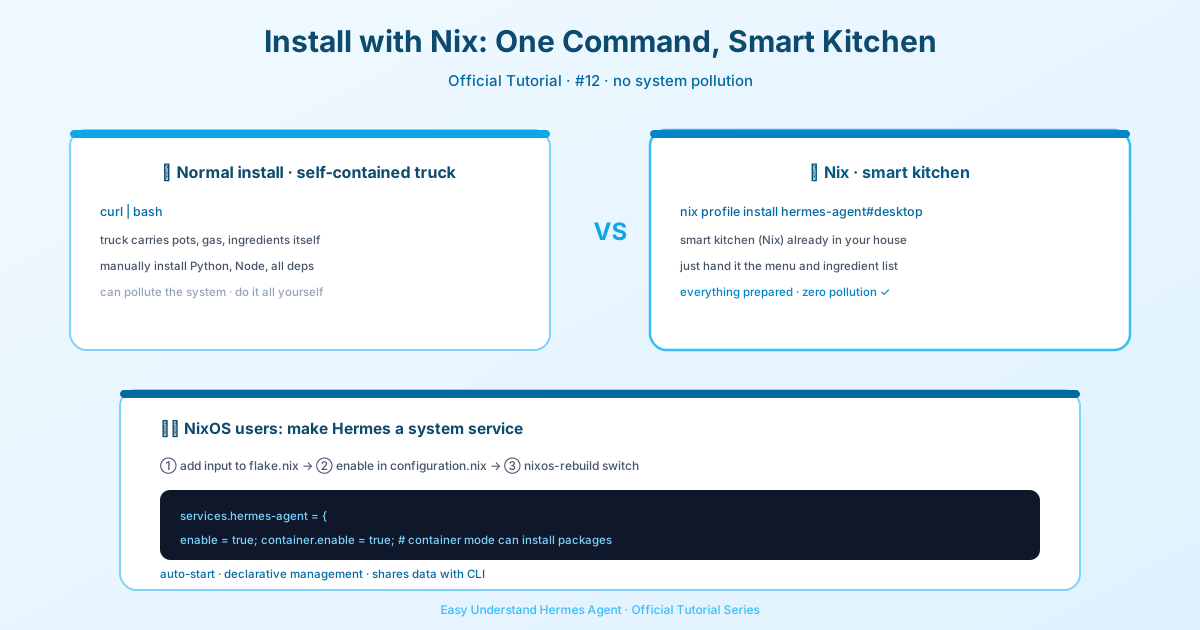
Tutorial 12: Nix & NixOS Setup
Welcome back! In this tutorial, we’re diving into the Nix and NixOS setup for Hermes Agent. If you’re new to Nix, don’t worry — we’ll keep things friendly and practical.
What’s New in This Guide
The Nix support has been significantly updated. Hermes Agent now ships with a Nix flake, a NixOS module, and a Home Manager module. This means you have more flexibility than ever to run Hermes exactly how you like.
Before we jump in, a quick heads-up: Nix and NixOS are considered Tier 2 platforms. That means the flake and NixOS module are maintained on a best-effort basis. If you need a fully supported setup, stick with the standard Docker or FHS installation paths.
Choose Your Level
Here’s a quick overview of the options available:
| Level | Who it’s for | What you get |
|---|---|---|
nix run / nix profile install |
Any Nix user (macOS, Linux) | Pre-built binary with all deps — then use the standard CLI workflow |
| Home Manager module | An agent for one person, on any distribution or macOS | Declarative configuration and a user service, without root |
| NixOS module (native) | NixOS server deployments | Declarative config, hardened systemd service, managed secrets |
| NixOS module (container) | Agents that need self-modification | Everything above, plus a persistent Ubuntu container for apt/pip/npm install |
How This Differs from Standard Install
The classic curl | bash installer manages Python, Node, and dependencies itself. The Nix flake replaces all of that. Every Python dependency is a Nix derivation built by uv2nix, and runtime tools like Node.js, git, ripgrep, and ffmpeg are wrapped into the binary’s PATH. There’s no runtime pip, no venv activation, and no npm install.
For non-NixOS users, this only changes the install step. Everything after — hermes setup, hermes gateway install, config editing — works exactly like the standard install.
For NixOS module users, the entire lifecycle is different. Configuration lives in configuration.nix, secrets go through sops-nix or agenix, the service is a systemd unit, and CLI config commands are blocked. You manage Hermes the same way you manage any other NixOS service.
Prerequisites
- Nix with flakes enabled — Determinate Nix is recommended (enables flakes by default)
- API keys for the services you want to use (at minimum: an OpenRouter or Anthropic key)
Quick Start (Any Nix User)
No clone needed. Nix fetches, builds, and runs everything:
# Run the desktop app
nix run github:NousResearch/hermes-agent#desktop

# Or install persistently
nix profile install github:NousResearch/hermes-agent#desktop

# Run the TUI
nix run github:NousResearch/hermes-agent -- setup
nix run github:NousResearch/hermes-agent -- --tui

# Or install it in your profile
nix profile install github:NousResearch/hermes-agent
hermes setup
hermes --tui
After nix profile install, hermes, hermes-agent, and hermes-acp are on your PATH. From here, the workflow is identical to the standard installation — hermes setup walks you through provider selection, hermes gateway install sets up a launchd (macOS) or systemd user service, and config lives in ~/.hermes/.
A note on size: The default package includes ALL libraries Hermes might need, adding about 700 MB to the closure. If you only need messaging platforms (Discord, Telegram, Slack), check the #messaging output — it adds just ~33 MB.
Running from a local clone? Here’s the quick version:
git clone https://github.com/NousResearch/hermes-agent.git
cd hermes-agent
nix develop
hermes setup
NixOS Module
The flake exports nixosModules.default — a full NixOS service module that declaratively manages user creation, directories, config generation, secrets, documents, and service lifecycle.
Important: This module needs NixOS. If you want an agent for one person (not a system service), use the Home Manager module instead — it runs on NixOS and any other system Home Manager supports.
Add the Flake Input
# /etc/nixos/flake.nix (or your system flake)
{
  inputs = {
    nixpkgs.url = "github:NixOS/nixpkgs/nixos-unstable";
    hermes-agent.url = "github:NousResearch/hermes-agent";
  };

  outputs = { nixpkgs, hermes-agent, ... }: {
    nixosConfigurations.your-host = nixpkgs.lib.nixosSystem {
      system = "x86_64-linux";
      modules = [
        hermes-agent.nixosModules.default
        ./configuration.nix
      ];
    };
  };
}
Minimal Configuration
# configuration.nix
{ config, ... }: {
  services.hermes-agent = {
    enable = true;
    settings.model.default = "anthropic/claude-sonnet-4";
    environmentFiles = [ config.sops.secrets."hermes-env".path ];
    addToSystemPackages = true;
  };
}
That’s it! nixos-rebuild switch creates the hermes user, generates config.yaml, wires up secrets, and starts the gateway — a long-running service that connects the agent to messaging platforms and listens for incoming messages.
Secrets are required. The environmentFiles line assumes you have sops-nix or agenix configured. The file should contain at least one LLM provider key (e.g., OPENROUTER_API_KEY=sk-or-...). No secrets manager yet? You can use a plain file as a starting point — just make sure it’s not world-readable:
echo "OPENROUTER_API_KEY=sk-or-your-key" | sudo install -m 0600 -o hermes /dev/stdin /var/lib/hermes/envservices.hermes-agent.environmentFiles = [ "/var/lib/hermes/env" ];Pro tip: Setting addToSystemPackages = true does two things: puts the hermes CLI on your system PATH and sets HERMES_HOME system-wide so the interactive CLI shares state (sessions, skills, cron) with the gateway service. Without it, running hermes in your shell creates a separate ~/.hermes/ directory.
Cron on a native install needs a lingering service user. Scheduled cron jobs run in a transient systemd-run --user --scope, so a gateway restart can’t kill a running job. That requires a systemd user manager for the service uid, which only exists when the uid lingers. With createUser = true the module handles this for you (nixpkgs ≥ 25.05). If you declare the user yourself (createUser = false), set linger = true on it or run sudo loginctl enable-linger <user> once — otherwise cron falls back to unscoped workers, or fails closed under cron.require_restart_safe_scope: true.
That’s the Nix setup in a nutshell. Whether you’re a casual Nix user or running a full NixOS deployment, Hermes Agent now fits right into your workflow. Happy hacking!
📖 Official Docs
This article is based on the official Hermes Agent documentation:Official docs › getting-started/nix-setup