Vision & Image Paste — AI Can See Images
Vision & Image Paste — AI Can See Images — easy-to-understand guide based on official docs
Vision: AI That Actually Sees Your Images
Imagine sending a screenshot to a friend and saying, “What do you notice here?” — except the friend is your AI agent, and it answers instantly. That’s exactly what Hermes Agent can do now.
What Does This Mean?
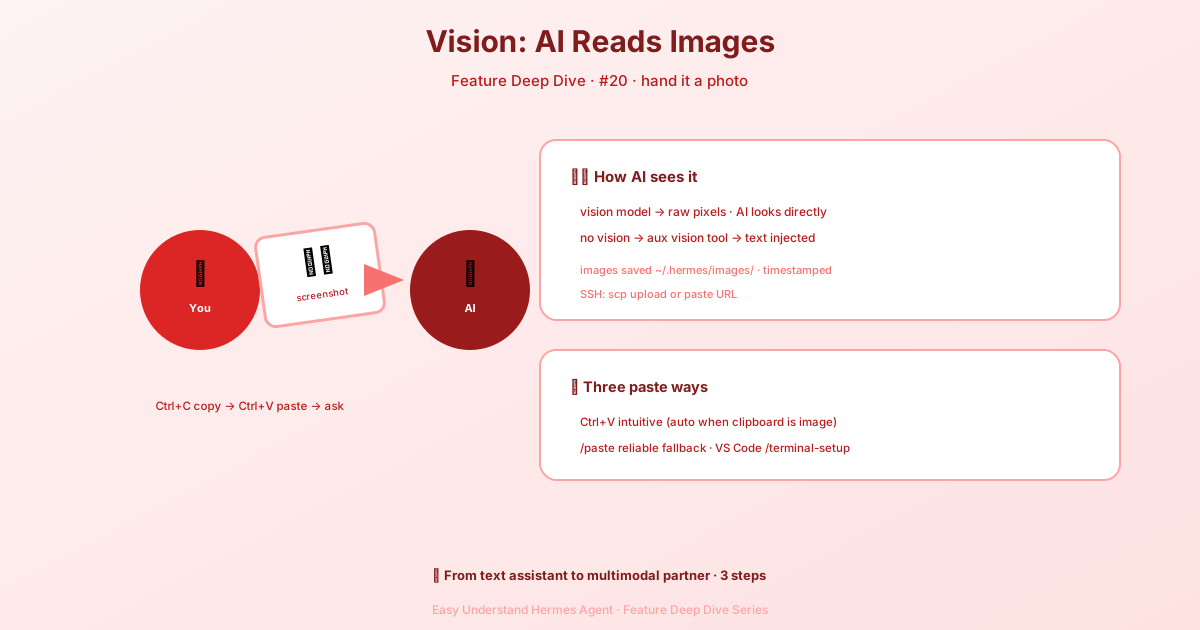
Hermes Agent can look at images you paste into the terminal. You don’t need to upload files or type file paths. Just copy an image, attach it, and ask questions like “What’s wrong with this error message?” or “Describe this chart.”
How to Attach an Image (3 Simple Ways)
Method 1: The /paste Command (Most Reliable)
Type /paste and press Enter. Hermes checks your clipboard and attaches whatever image you copied.
/pasteThis works almost everywhere — even when your terminal normally messes up Cmd+V or Ctrl+V.
Method 2: Just Press Cmd+V / Ctrl+V
If you’re on macOS Terminal, iTerm2, or most Linux desktops, you can simply paste like you normally would. Hermes is smart enough to detect when your clipboard contains an image and attach it automatically. Pasted macOS screenshot temp paths and file://... image URIs also attach right away instead of sitting in the composer as raw text.
Method 3: /terminal-setup for VS Code Users
If you use VS Code, Cursor, or Windsurf as your terminal, run this once:
/terminal-setupThis fixes common keyboard shortcuts like Cmd+Enter and undo/redo that the IDE sometimes intercepts. Run it on your local machine only — not inside an SSH session.
What Happens After You Paste?
Once you attach an image, you’ll see a small badge above your input:
[📎 Image #1]You can attach multiple images before sending — each gets its own badge. Press Ctrl+C to clear them all. Then type your question and press Enter. The image is sent to the AI model as a vision block, and it processes it just like a human would look at a picture. Images are saved to ~/.hermes/images/ as timestamped PNG files.
Which Platforms Work Best?
| Environment | Paste Support | Notes |
|---|---|---|
| macOS Terminal / iTerm2 | ✅ | Best experience |
| Linux (X11) | ✅ | Needs xclip installed |
| Linux (Wayland) | ✅ | Needs wl-paste installed |
| WSL2 (Windows Terminal) | ✅ | Works out of the box |
| VS Code / Cursor / Windsurf | ✅ | Run /terminal-setup first |
A Quick Tip for Clipboard-Only Images
Here’s a common gotcha: if your clipboard has only an image (no text at all), some terminals can’t send the image bytes directly. That’s why /paste exists — it’s your safety net.
Pro tip: If you’re on macOS and take a screenshot, Hermes can even recover the screenshot’s temporary file path automatically. Just paste and go.
What If Your Model Can’t See Images?
Not every model supports vision. Hermes handles this for you: if your current model is vision-capable, the image is sent as real pixels. If it’s text-only, Hermes routes the image through a helper vision model that describes it in words, then feeds that description into the conversation. You don’t have to configure anything — switch between models mid-session and image handling just works.
If you need to force a specific behavior, set agent.image_input_mode in config.yaml:
auto(default) — native pixels when the model supports vision, text description otherwise.native— always attach pixels, even for text-only models.text— always use the text-description path, never attach pixels.
This is handy when a backend accepts text but rejects native image input. Point auxiliary.vision at a different vision-capable provider and model, and images switch to the description path automatically.
Summary
Hermes Agent now lets you paste images and get AI-powered analysis — no file uploads, no complex setup. Copy an image, use /paste (or just paste), ask your question, and watch the magic happen.
Practical tip: Start with /paste when you’re unsure. It’s the most reliable method across all platforms. Once you get comfortable, try plain Cmd+V — it works great on most systems and feels even more natural.
📖 Official Docs
This article is based on the official Hermes Agent documentation:Official docs › user-guide/features/vision